SAP Analytics Cloud (SAC) – How to set up a landing page for the SAC dashboard
By Trijotech Team/ July 20, 2021Introduction:
SAP Analytics Cloud is a powerful tool that enables organizations to create and share interactive dashboards, reports, and data visualizations. One essential component of an analytics solution is a landing page. It is the entry point to the SAP Analytics Cloud project. It is designed to provide users with an overview of the project and redirect them to different components of the project.
In this blog, we will explore how to create a landing page in SAP Analytics Cloud. We will cover the key components of a landing page, including its purpose, design, and functionality. Whether you are new to SAP Analytics Cloud or an experienced user, this blog will provide you with the knowledge and skills necessary to create an effective landing page that meets the needs of your organization.
The process of setting up a landing page for your SAP SAC Landing Page
You can use several widgets to create a landing page. To set up the UI for your landing page you can start with creating custom header and footer where you can place a logo, a search bar, and navigation buttons in the header panel, while placing links to social media accounts, support pages, and legal disclaimers in the footer panel.
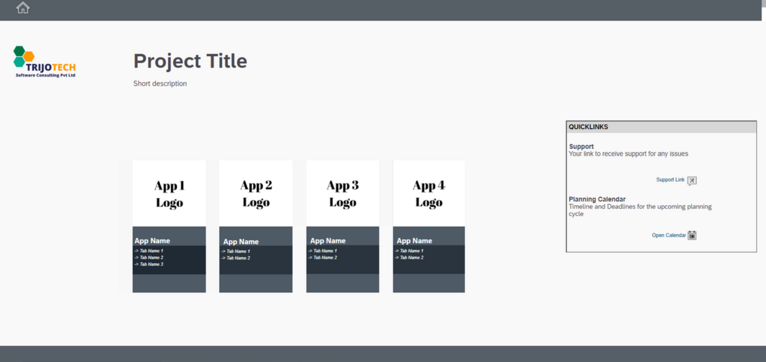
The main canvas of the landing page is where you can add widgets to showcase your project title, description, and company logo. You can also include icons that redirect users to other applications or stories within SAC. This helps to create a consistent user experience and navigation flow within SAC.
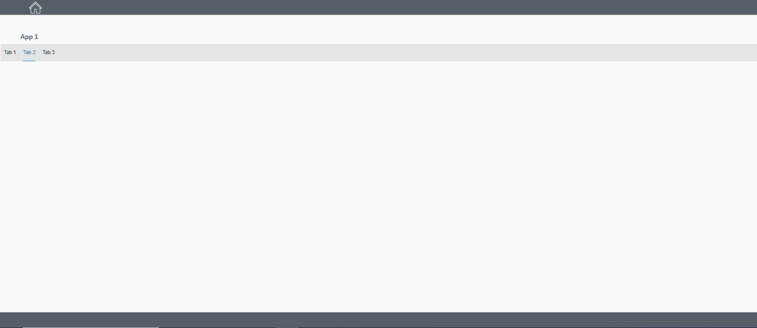
To understand better, we will be creating a simple landing page as shown in the above figure.
1. Steps to create Navigation Buttons:
1.1. Use a Flow Layout Panel to place your navigation buttons. A flow layout panel is a type of container that allows you to arrange widgets in a flow direction, either vertically or horizontally.
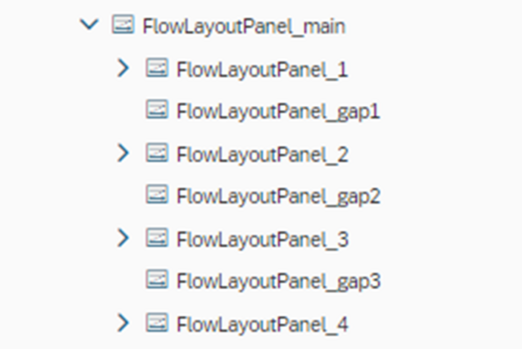
To implement this layout in your application, you should create a new Flow Layout Panel and name it “main”. Then, you can add four other Flow Layout Panels inside the “main” panel. These four panels will be arranged in a flow direction within the “main” panel, creating a nested layout.
The advantage of using a Flow Layout Panel is that it allows you to easily adjust the layout of the widgets as the size of the container changes. The widgets will automatically flow to the next line or column as needed, without overlapping or becoming misaligned. This can make your GUI more flexible and responsive to different screen sizes and resolutions, improving the user experience.
1.2. When using multiple Flow Layout Panels to arrange controls, you may want to add some space or a gap between them to enhance the overall layout and presentation of the user interface.
To achieve this, you can insert another Flow Layout Panel in between two existing ones, and this intermediate panel will serve as the gap or spacing element. It’s common practice to name these gap panels as FlowLayoutPane gap to differentiate them from other panels in the layout.
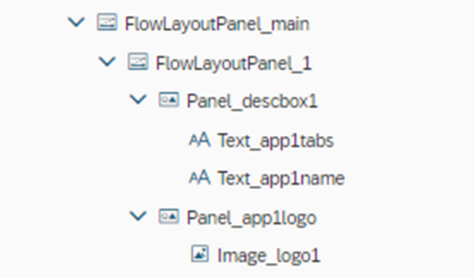
1.3. Inside FlowLayoutPanel_1, add the two panels, first add a normal panel and set the properties of this newly created panel to accommodate the application logo, such as its size and position. The same process should be followed to add the second panel for the application description. This panel should be positioned below to the panel for the logo and can also be customized to include appropriate text, fonts, and colors to enhance its appearance.
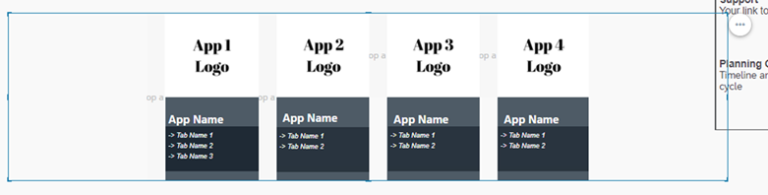
1.4. Follow a similar process for customizing the other three panels. The figure referred below shows an example of what the navigation panel should look like after customization.
1.5. Now the user interface (UI) of the landing page has been created, the next step is to add links to the navigation buttons that were created earlier. These links will redirect the user to the respective applications or sections of the project.
There are two ways to add links to these navigation buttons, depending on the user’s requirements:
1.5.1. Using a static link
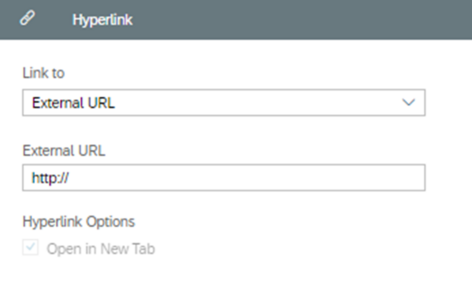
The first method is to use a static link, which is a link that does not change and always points to a specific URL. To add this link, click on the three dots that appear on panel and select add hyperlink.
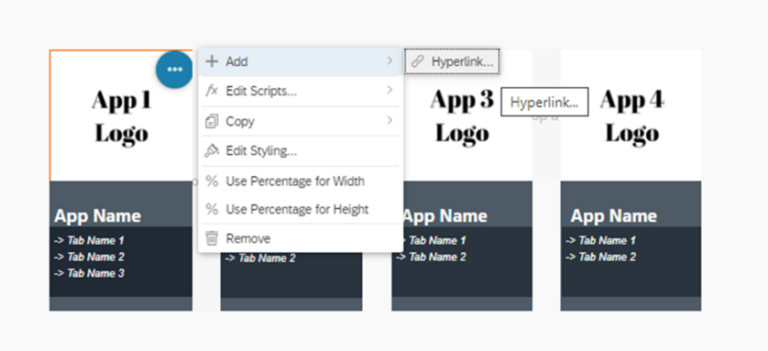
Then copy paste your link here.
1.5.2. Using a dynamic link
The second method is to use a dynamic link, which is a link that is generated dynamically based on the user’s input or other factors. For example, a dynamic link may be generated based on the user’s selection of a new bookmark. This method is useful when the destination URL changes frequently and needs to be updated automatically.
To create dynamic links in the SAP Analytics Cloud (SAC) platform, a standard function named “NavigationUtils.openApplication()” is provided. This function takes a few parameters that define the URL and any additional parameters that need to be passed to the destination page. You can place this function in the onclick script of the panel.
For example:
NavigationUtils.openApplication(“appid”, [UrlParameter.create(‘mode’,’embed’), UrlParameter.create(‘bookmarkId’,’DEFAULT’)], false);
The first parameter of this function is the “appid,” which is a unique identifier for the destination URL. The second parameter is an array of URL parameters that can be passed to the destination URL. These parameters can be used to specify the mode of operation or any other context information that needs to be passed to the destination page. In the example given, two URL parameters are being passed to the destination page, namely ‘mode’ and ‘bookmarkId.’
The third parameter of this function is a Boolean value that indicates whether to open the destination page in a new tab or not. If the value is true, the destination page will open in a new tab. If the value is false, the destination page will open in the current tab.
With this script the current application bookmark is opened in the same tab.
2. Steps to create Header and Footer
To create header and footer, you can simply add sub-panels to the main panel. For example, you might create a toolbar in the header by adding a sub-panel to the main Flow Layout Panel, and then adding buttons, icons, or other controls to the sub-panel. The sub-panel can be given a fixed height to create space for the toolbar, and the Flow Layout Panel will automatically adjust the layout as controls are added or removed.
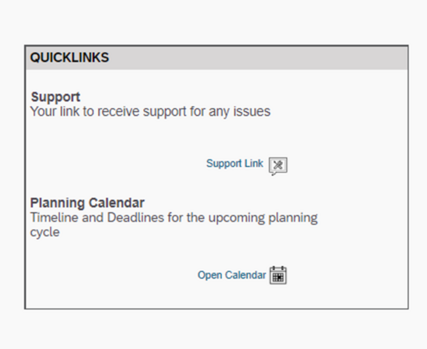
3. Adding Quick Links
You may want to add quick links to the landing page to help other users access the resources they need to get help with using the platform. It is a quick and easy way to provide users with access to helpful resources like user guides, forums, and support tickets.
To add support links to the SAP Analytics Cloud landing page, you can use the button widget and attach hyperlink as explained above. You can also add your calendar link here. Once you have added all of the links, you can save your changes and make the landing page more useful for users.
Conclusion
Setting up a landing page for your SAP SAC dashboard is a simple and straightforward process that can help you gain a deeper understanding of your business components. To make the most out of the SAC landing page, users should consider customizing it to suit their specific needs and workflows.
To summarize, creating a landing page in SAP Analytics Cloud is an essential component of an analytics solution. The landing page serves as an entry point for users and provides an overview of the project while redirecting them to different components. Using widgets and flow layout panels, you can easily create a customizable landing page with navigation buttons, a project title, and a company logo. By adding links to the navigation buttons using static or dynamic methods, users can be redirected to different sections of the project. Creating a well-designed landing page can improve the user experience and provide a consistent navigation flow within SAP Analytics Cloud.
To read more of our blogs you can surely click here.
Check out other video blogs.
Disclaimer: All the opinions are solely for information purposes, and the author doesn’t recommend or reject any tools. It should be done after your own due diligence.